

What to do with food scraps? Let us count the ways…
Food scraps make up nearly 20% of the waste we create in the Northland every day! That’s about 180,000 pounds every year and equal to the weight of 1332 elephants. Food scraps contain an abundance of nutrients and other good stuff that is wasted if discarded in the trash that ends up in the landfill. Food scraps in landfills produce methane as they decompose, releasing this greenhouse gas into the environment. In our region, we’re lucky that there are several ways to manage food waste. In this blog series, we’ll explore some of those options.
Composting is an efficient way to use the nutrients and organic matter in food scraps for enriching soil in our gardens. Find DIY compost bin instructions online, or use WLSSD’s community drop site program, where we collect food scraps for composting at our large-scale site in Lincoln Park. But maybe outdoor composting isn’t a good fit for your location, or you are frustrated with long winter months when outdoor composting isn’t ideal? Perhaps it is challenging to get your scraps to a drop site?
Worm composting, or vermicomposting, might be an interesting option for you. Basically, it is handing the composting process over to the worms, in a bin, that stays indoors. If you have a little extra counter space in your mudroom, cupboard, closet, basement, or heated garage, you can create a worm composting utopia! With just a little effort, it can be a convenient (and mostly odor free!) set up for tossing in your food scraps during the winter months when composting outdoors slows down significantly, or for composting scraps all year round. The benefits of managing your own worm ranch are many, but of primary importance, is the fertilizer that it produces – in the form of a soil-like compost and “worm tea”. More on these fertilizers later.
You can make your own worm composting bin using a plastic storage container, or you can buy one locally (see below), and online. If you are the DIY-type, here’s how to get started on two different options.
First, buy your bin. This will depend on the amount of scraps you produce, but 20 – 33 gallon tubs are recommended. Option 1: Drill holes in the bottom of the bin and set it over a tray to collect the liquids the worm composting process creates. Option 2: Insert a spigot in the side near the bottom of the bin in order to drain fluids. If you choose the spigot route, you’ll also want to insert a plastic filter (or maybe pea rock?) in the bottom of the bin to provide a space for the fluid to collect. In both options, you’ll want to put some landscape fabric across the bottom over the drilled holes, or on top of the filter, so the worms don’t slip though.
Next, you’ll want to provide bedding. Moist brown leaves make a great bedding. You could also use moist peat moss. Don’t forget to throw in some sand – worms don’t have pearly whites, so they use the sand in their gizzards to grind up food. Crushed/ground up egg shells provide worms with calcium that they’ll need. Lastly, you’ll also want a sheet of plastic (cut garbage bag) that will be placed over the bedding to hold in moisture as needed, to help keep fruit flies out, and also to keep the space dark, just how worms like it! You’ll want to see condensation on the underside of the plastic sheet as a sign of appropriate moisture – but you don’t want the bin to be soggy. A dry layer of leaves, or other bedding material, on top of the moist layer is a good idea for absorbing excess moisture. A well-ventilated cover can be placed on top, but worms need oxygen, so nothing airtight.
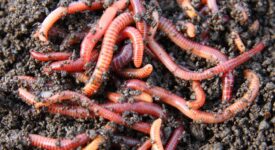
Now, you’ll need to get the worms! You may be able to track some down from local vermicomposters, and they are also available online. The best worms for composting are not the worms in our yards. Look for a type of worm called Red Wrigglers (Eisenia fetida). Tuck your worms into a moist section of bedding. If you can buy them already in some of their compost (with bacteria and other decomposers), the process will be up and running more quickly.
Time for the food scraps! As you create food scraps, you’ll want to place them in the bedding so that they are not exposed. Otherwise, they’ll be a delicious attractant for fruit flies. Each time you place food in the bin, choose a different corner of the bin so all of the food does not accumulate in one space. Hold off on adding scraps if the bin is getting too full. Give the worms a chance to catch up on snacking –and reproducing. Over time, worms will reproduce at a rate that matches the food supply. Avoid meats (small bits are okay), dairy, and fried foods, as these can result in odors. Make sure to cut up the food into small pieces, and be mindful of the skins, which can be a barrier to worms eating the food. Start out slow, maybe adding a handful every other day. Make space in the bedding for your scraps and mix in some soil/bedding to help create access to the scrumptious bits. As the food and bedding begin to turn into a soil-like product, you can take the “soil”, and sprinkle it on your indoor or outdoor potted plants, and in your garden too. The worm “juice” (or worm tea) that you collect out the bottom of your bin contains nitrogen; it can be diluted and used as a fertilizer! Store worm juice in an uncapped container or bucket, or use a well ventilated lid, to prevent odors.
Worm composting is a fun “pet” project, and you may find that learning more about worms and their life cycle can help you become a better worm rancher. For example, did you know that worms create eggs (cocoons)? Each cocoon can contain several baby worms. When removing soil from your bin to apply to your plants, you’ll want to pick out the tiny eggs (and any stray worms) and place them back in the bin to keep the population of worms growing strong!
If this blog has sparked your curiosity, and you’d like to know more, Ellen Sandbeck is a local vermicomposting resource and legend! She is an expert on worm composting, and can provide community members with pre-made bins, red wrigglers, and lots of advice! She even started the worm composting system at Stowe School, where the worms eat lunch scraps! Ellen has written an incredibly helpful vermicomposting handbook; this guide was used as a reference for writing this blog and long before that, inspired years of vermicomposting in my own home (Thanks Ellen!).
If you think you might favor feathered friends over subterranean slitherers, chickens are fabulous consumers of food scraps and you get eggs out of the deal. Just be sure to follow city, township and county rules for raising chickens in your backyard. Check back for more on raising chickens in the coming weeks.